.png)
Installation and Setup
Deploying the TDE Agent
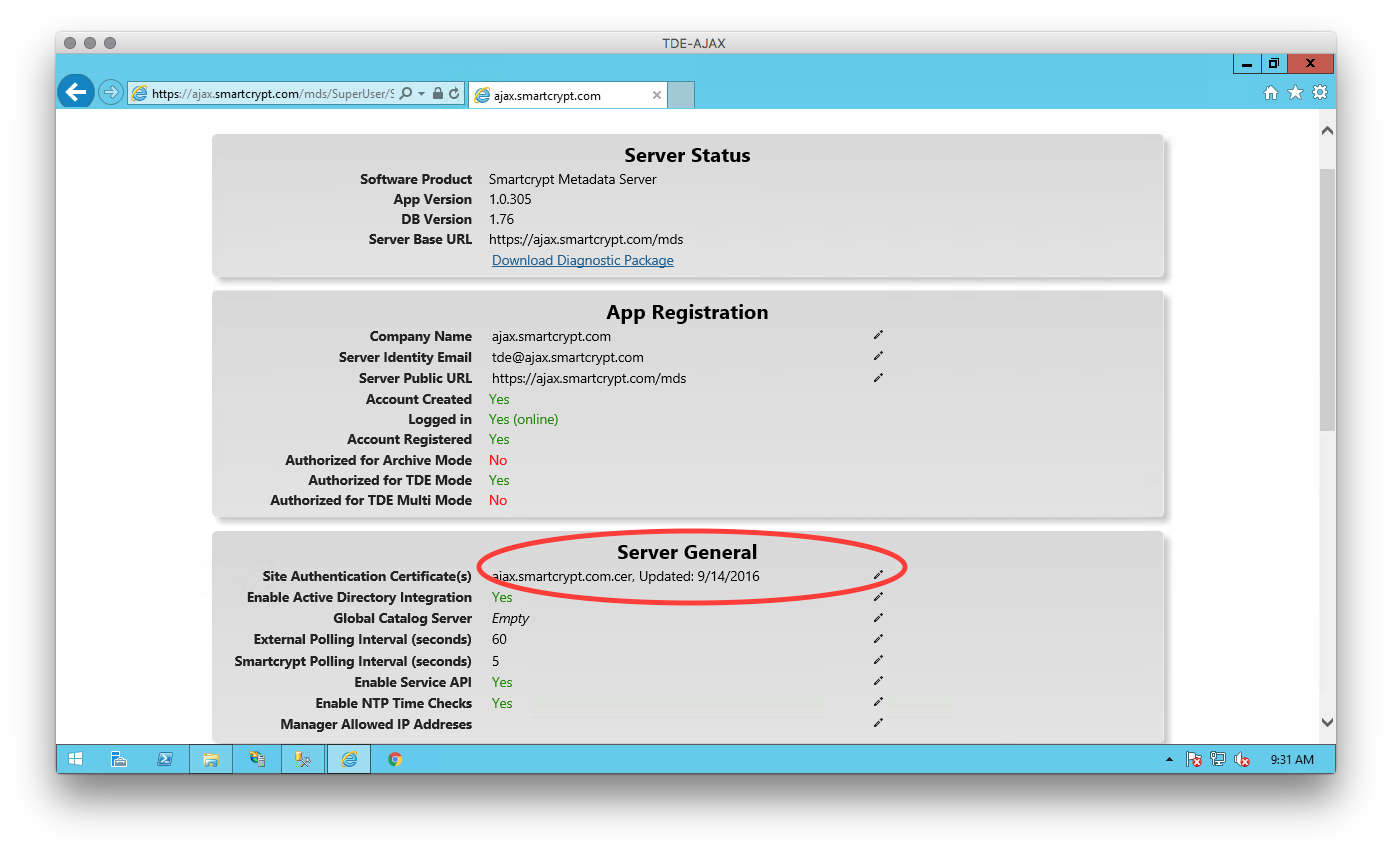
Before installing TDE agents, you must choose your SSL certificate. The selected certificate must be specified via the PK Endpoint Manager's Basics tab and will get bundled with the TDE Agent installer.
The PK Endpoint Manager PowerShell script uploads a self-signed certificate by default. To continue using this self-signed certificate, export its public key, and import it to each device that will run the TDE Agent. To do this:
- Open Internet Explorer and navigate to your site (in this case: https://ajax.smartcrypt.com/mds/superuser).
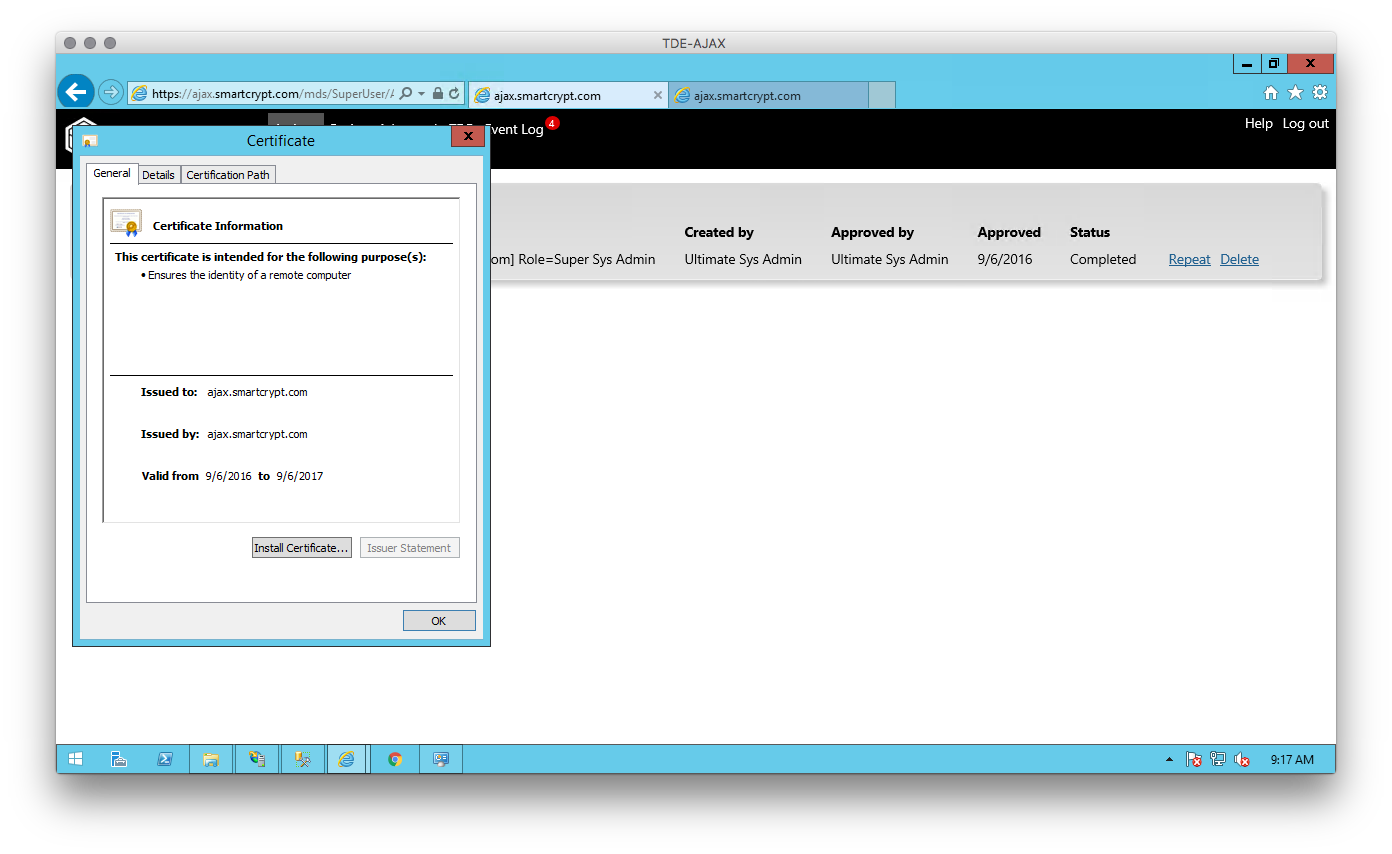
- Click the lock in the address bar.
- Click View Certificates.

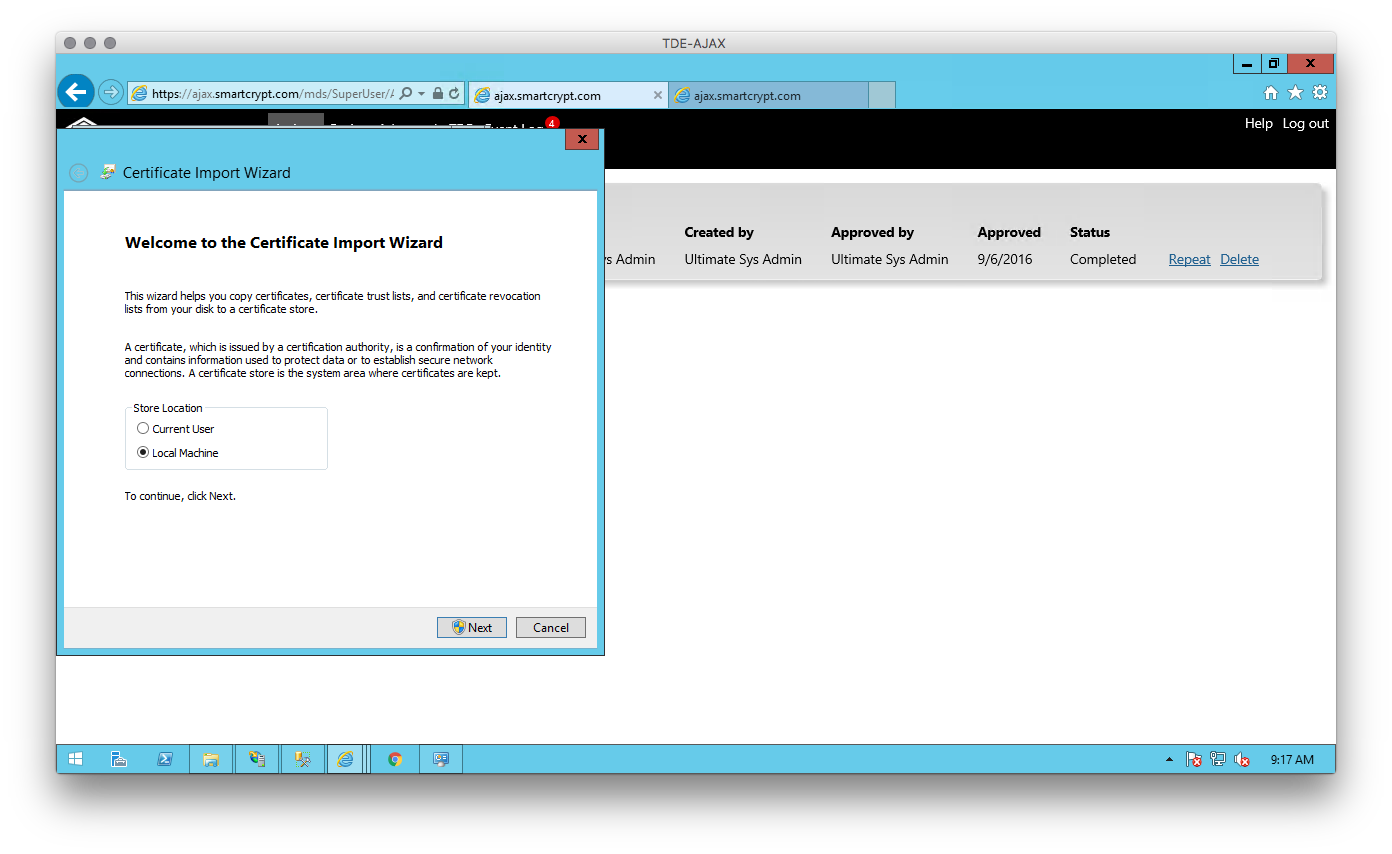
- Click Install Certificate.
- Choose Local Machine, then Next.
- Click Place all certificates in the following store.
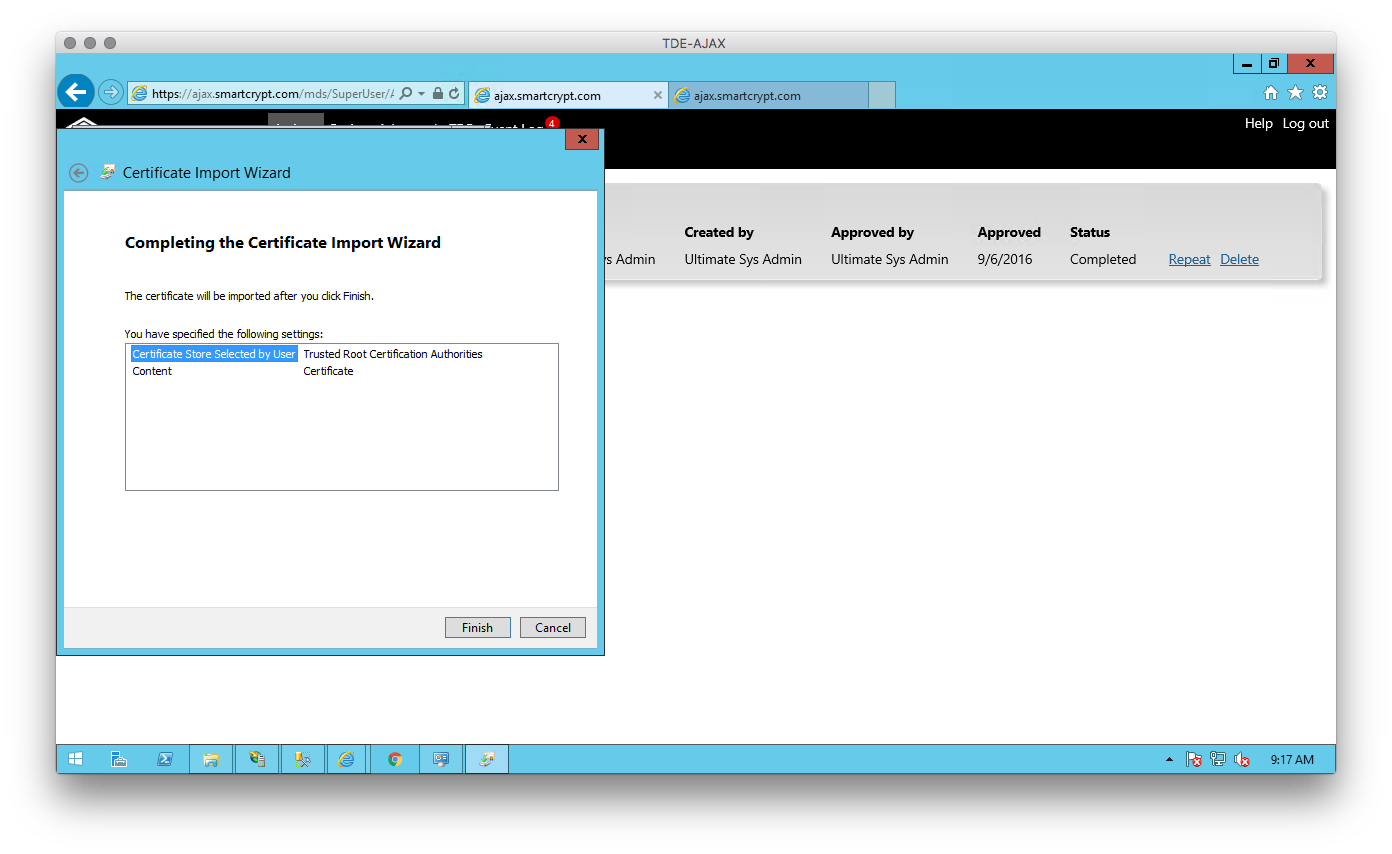
- Browse to the Trusted Root Certification Authorities store. Click Next.
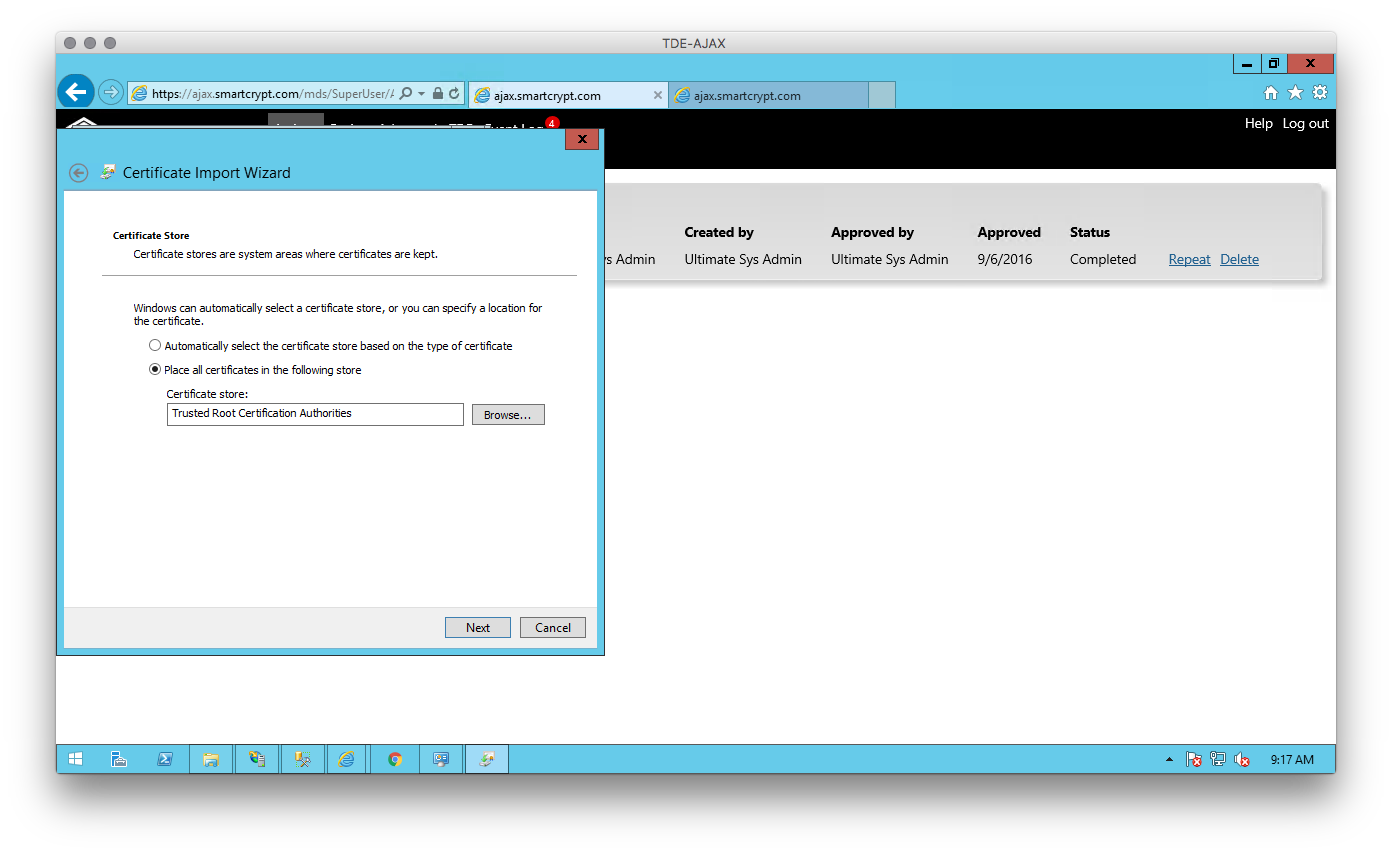
- Click Finish to exit the wizard.
To use your own certificate, configure your SSL binding in the Internet Information Server (IIS) Management Console. Upload the public key for that certificate in the Manager Basics tab.
Add/Configure a Key
Use the Keys page on the TDE tab to add a new TDE-specific key, or to establish a rotation schedule for your TDE keys.
Click Add TDE Key to create a new key. Name this key and (optionally) add Participants to define who can access this key.
Key Rotation
Key rotation allows administrators to introduce a new active key and stop using the current active key for encryptions. When a new key is produced, copies of it are generated for all asset participants. By default, no key rotation schedule is set.You can manually rotate a key by clicking the Rotate link on the Keys page.
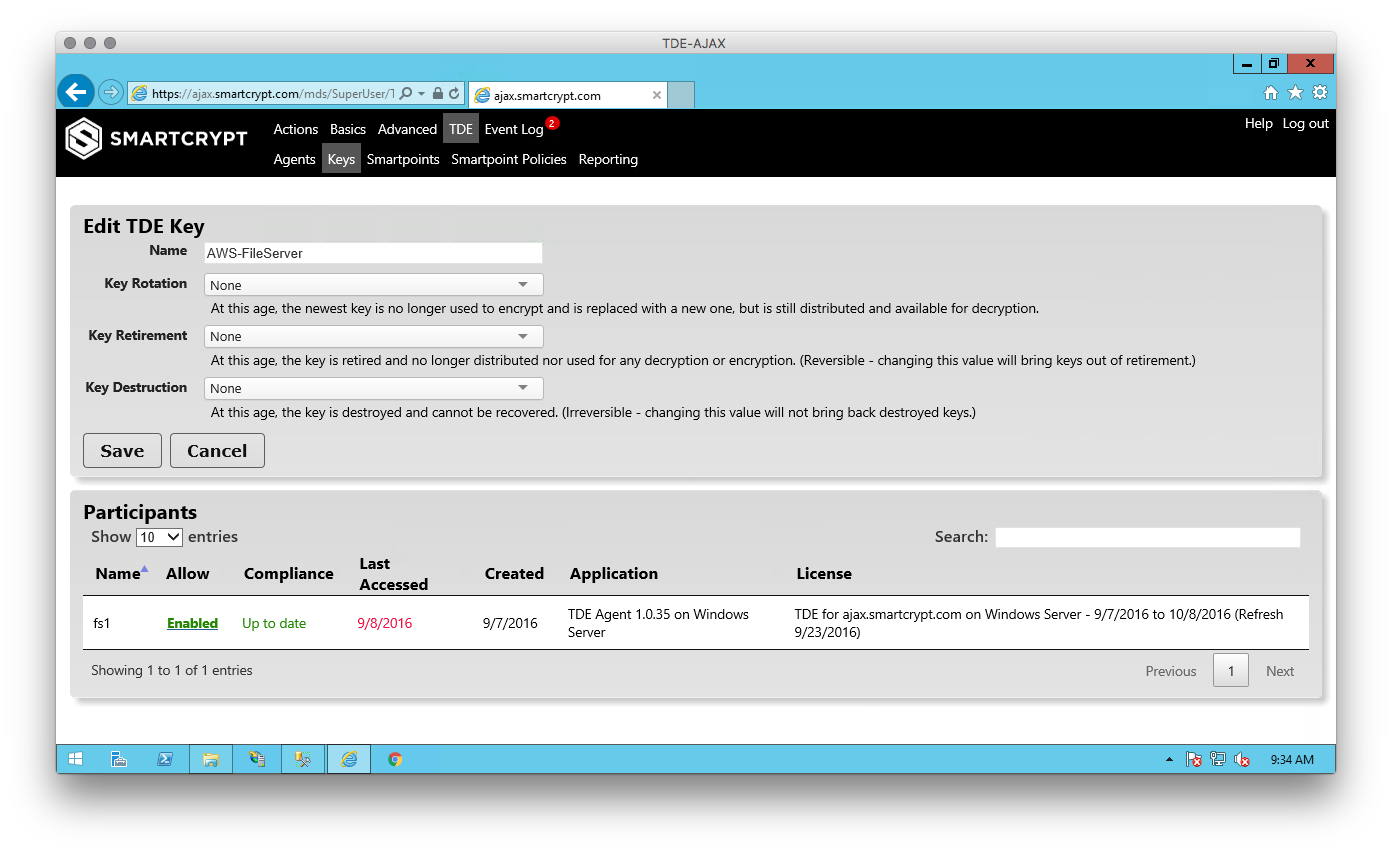
The key rotation interval is set on the Add TDE Key or Edit TDE Key page, along with the Retirement and Destruction schedules. Use the Key Rotation drop-down menu to choose when to replace an active key. Choices range from 1 month to 10 years. The clock starts when you change this setting.
When you change the Key Rotation interval, the Manager will recognize the change within an hour, and may immediately generate a new key if the interval changed.
The Key Retirement schedule defines when to cease all use of a key. A retired key is no longer distributed or used for encryption or decryption. Retired keys can be restored. Use the Key Retirement drop-down menu to choose when to retire a key. Choices range from 1 month to 10 years. The clock starts when you change this setting. That is, if on January 5, 2017 you set this key to retire in 1 year, the key will become unavailable on January 5, 2018. As with Key Rotation, the Manager (and clients in turn) will recognize the change within an hour.
The Key Destruction menu identifies when to permanently remove a key from the key database. Use this drop-down menu to choose when to remove a key. Choices range from 1 month to 10 years. The clock starts when you change this setting. That is, if on January 5, 2017 you set this key to be destroyed in 1 year, the key will be destroyed on January 5, 2018.
Configuring a Smartpoint
Smartpoints are locations accessible by a client device where every file is encrypted with a TDE key. When you have configured a client to work with the Manager, use the Smartpoints tab to configure volumes on a device for TDE encryption.
Adding a Smartpoint
Follow these steps to add a new TDE Smartpoint to a device.
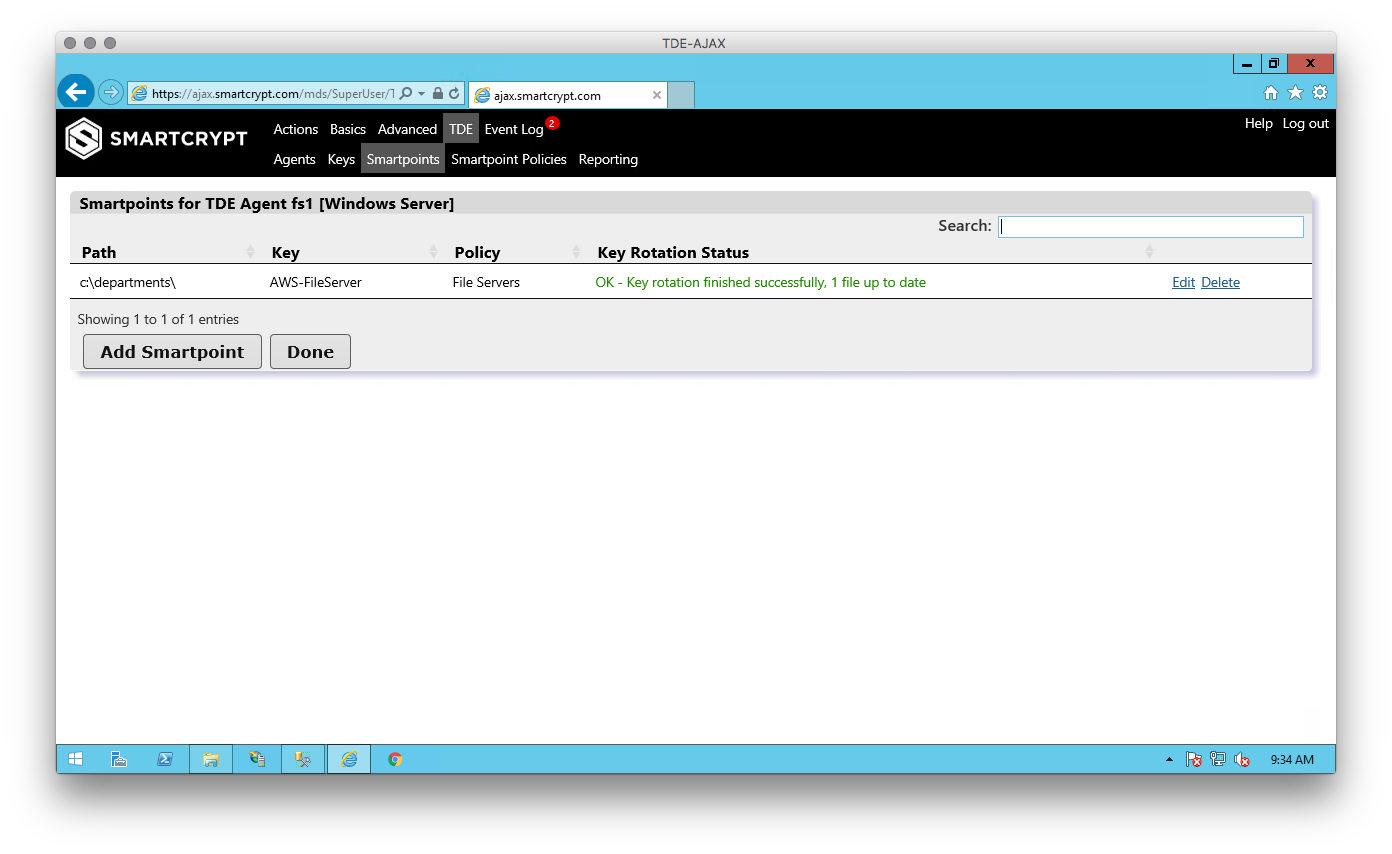
- Go to the TDE tab and select Smartpoints. A list of existing Smartpoints appears:
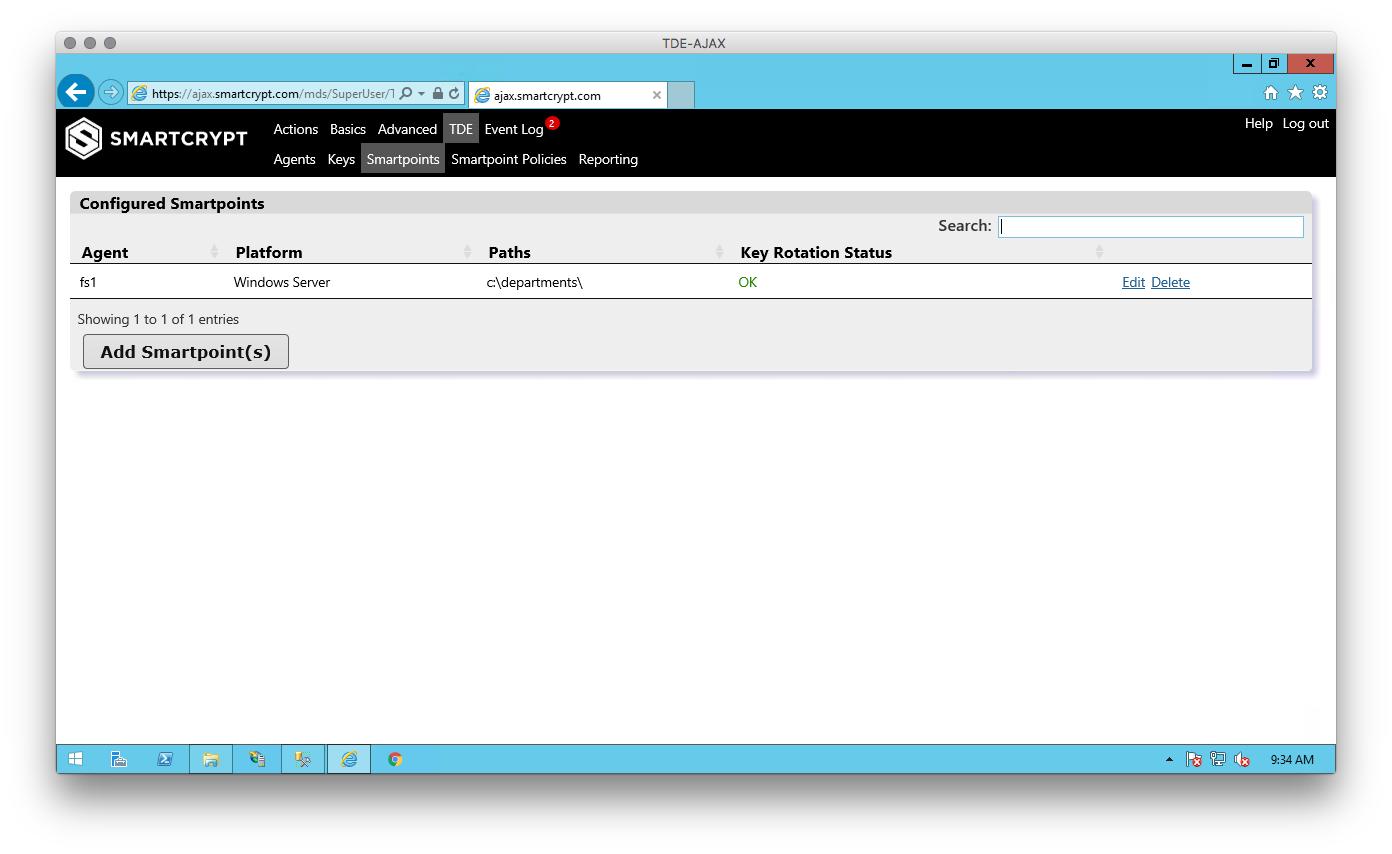
- Click Add Smartpoint(s). The Manager displays a list of up to 10 configured devices for this system. If the device you want is not on the list, start typing the agent/device name to locate it.
- Click the device link. The Add Smartpoint page appears:
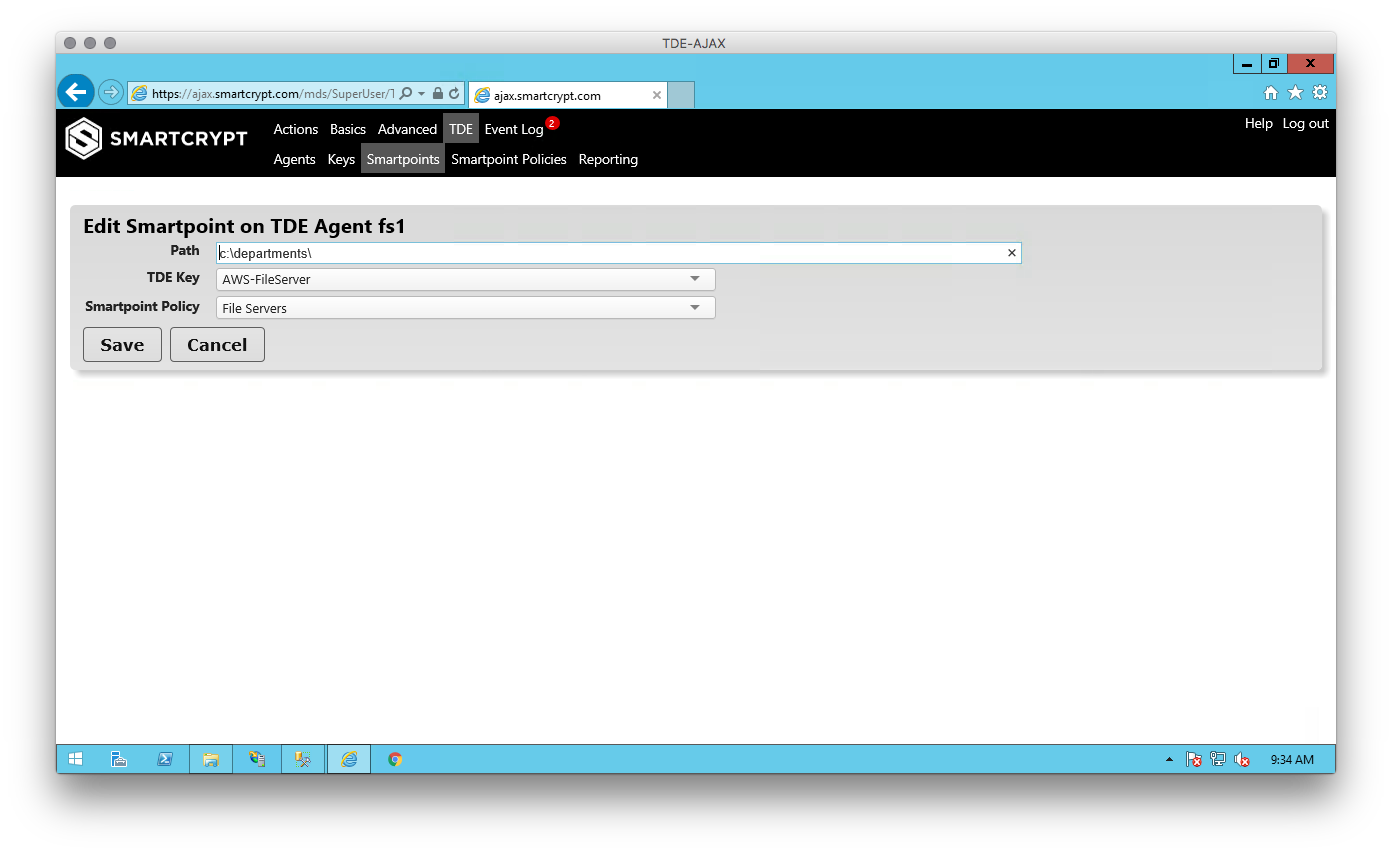
- Type the Path to the volume you want to encrypt.
- Use the TDE Key drop-down menu to select an active key.
- Use the Smartpoint Policy drop-down menu to select the Policy (see next section for more on this) that applies to this Smartpoint.
- Click Save to return to the Smartpoints list for this device. You may add more Smartpoints, or click Done to identify another device.
Editing a Smartpoint
To change any setting for an existing Smartpoint, locate the Smartpoint you wish to change, and click the Edit link. The Edit Smartpoint on <Device Name> page appears.
Make your changes as above. Click Save to confirm.
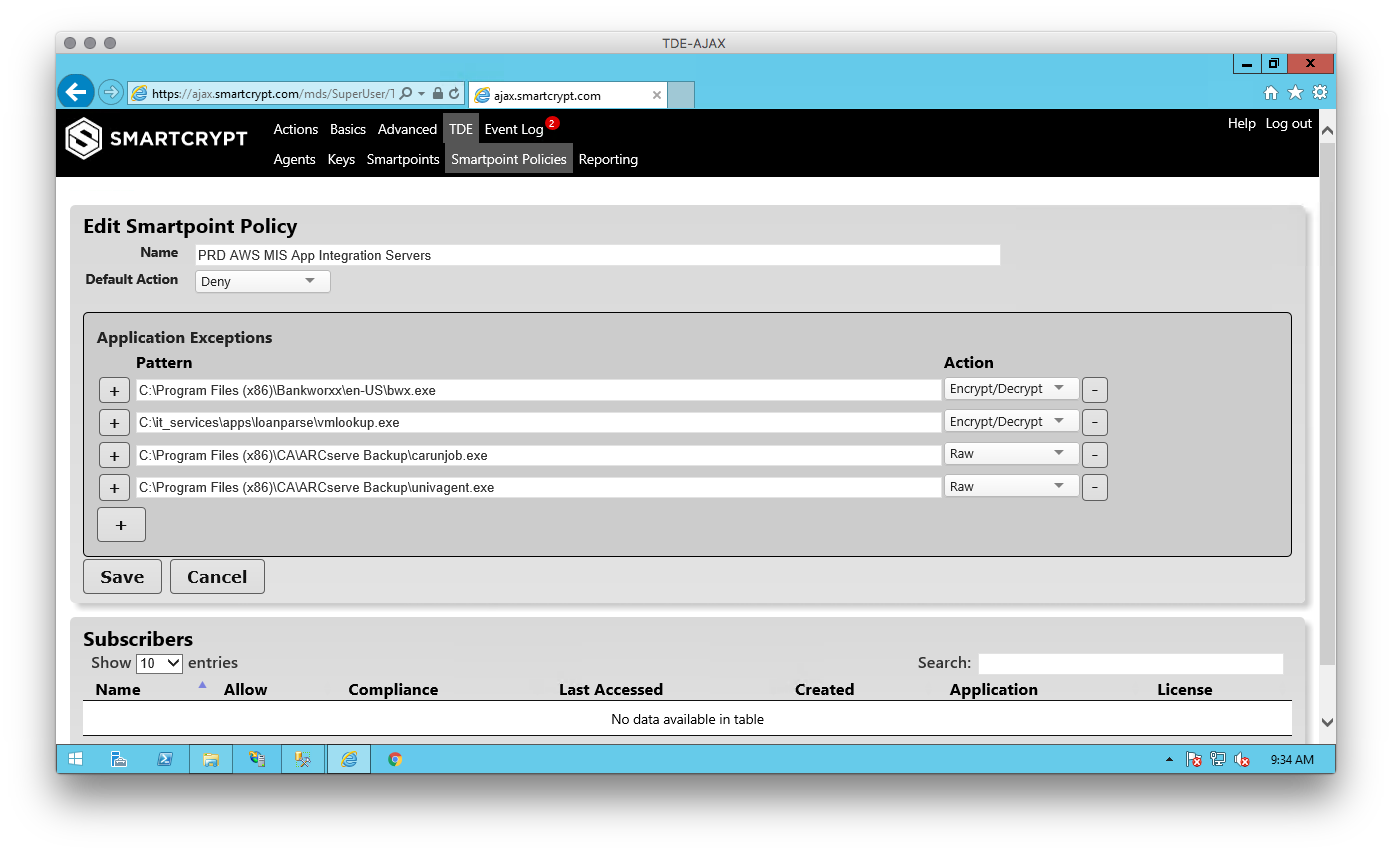
Configuring a Smartpoint Policy
A Smartpoint policy is a set of rules which tell the TDE agent how to operate. You may add, edit or delete Smartpoint policies in the Manager. Find more information about Smartpoint Policies on this page.
To add a new Smartpoint Policy:
- Go to Smartpoint Policies page. Any existing Smartpoint policies will display in a list.
- Click Add Smartpoint Policy.
- If you have defined more than one TDE Group on the Groups tab, select the Group this policy applies to.
- Choose a descriptive Name for the policy.
- Choose a Default Action.
- Identify any individual exceptions to the Default Action in the Application Exceptions.
- Click Save to add the policy.