.png)
Windows: Sharing Sensitive Information - Externally
The use and value of the sensitive files you’re working with isn’t restricted to people within your organization. Many times, the information needs to be shared with partners, customers or other users external to your organization as a part of regular business operations.
There are several reasons why information is considered sensitive and as a result, should be protected. When determining if a file should be protected before it’s saved or shared with others, you should consider the following:
- The content of the file – Files that contain personal of financial data like social security or credit card numbers are always considered sensitive, therefore should always be protected.
- Rules around sharing data with others – In order to preserve the secrecy of sensitive information organizations often have policies that designate information shared with certain users, should always be encrypted.
- Organizational policies around email attachments – Depending on the organization and configuration of PK Protect, policies could mandate that all email attachments must be encrypted.
The PEM Agent works in conjunction with Microsoft Outlook to protect files.
Sharing Encrypted Files as Email Attachments
Concept: When sending files via email, the PEM Agent interacts with Outlook to prompt users to take the required protection actions before the file is sent; you will see different prompts based on whether the attached file is already encrypted or not encrypted.
Things to consider:
- Is the file already encrypted?
- Which key is it encrypted with?
- If so, is the file encrypted with a key the recipient has access to?
Before you send the file, you should ensure it’s encrypted with the appropriate key or method, accessible by the recipients. If you send a file that can’t be opened by the recipient, you can always add them as a member of the Smartkey or encrypt the file with a passphrase.
NOTE: When providing a passphrase to a recipient, you should ALWAYS do so using an out-of-band such as via a phone call, text message or separate email.
Attaching Files that are NOT Already Encrypted
Process:
- Open Microsoft Outlook and create new message.
- Attach the desired file, using ‘drag and drop’ or the ‘Attach File’ button.
- Compose your email message and press the ‘Send’ button.
- You will be presented with the ‘Encryption Options’ page.

- As per policy, only the ‘Encrypt Attachments’ option is enabled.
- Click Next.
- Choose the desired method of encrypting the file. The ‘Choosing the Method of Encryption’ section describes the key selection options.
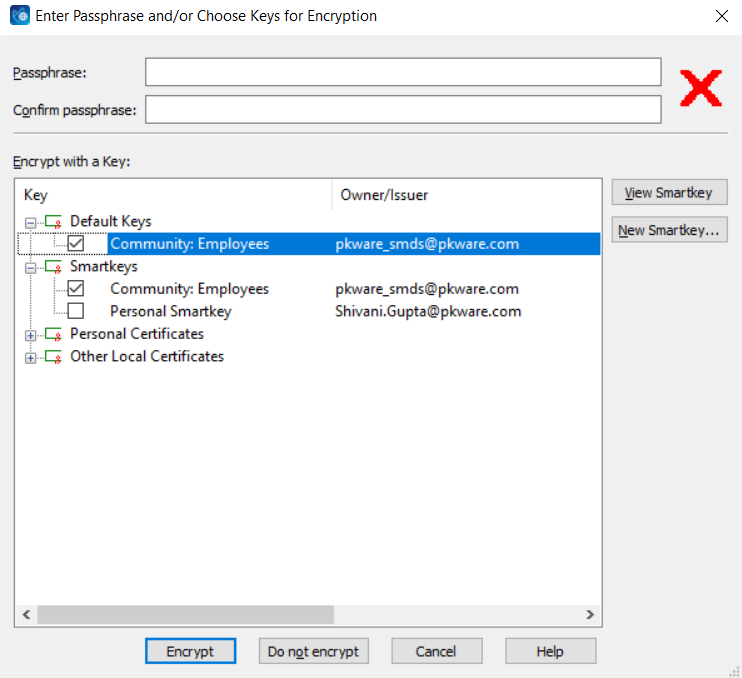
Click Encrypt.
An encrypted version of the file will be sent to the recipient identified in the email message.
Attaching Files that are Already Encrypted
Process:
- Open Microsoft Outlook and create new message.
- Attach the desired file, using ‘drag and drop’ or the ‘Attach File’ button.
- Compose your email message and press the ‘Send’ button.
- The email will be sent with the attached, encrypted file.
NOTE: Before you attach and send a file that’s already encrypted, ensure you check the Smartkey it’s encrypted with, is a key the recipient has access to.
Please see the ‘Viewing and Editing Smartkey Access’ to learn how to check and edit what users have access to which Smartkeys
My Attached File Exceeds the Maximum Size Limit
Concept: If you’ve attempted to share a file with others via email and experienced a failure due to the size of the file, you can use the PEM Agent to address the issue.
The PEM Agent allows you to compress files, thereby reducing its size and allowing you to share them through email without encountering file size limitations.
Process:
- Locate the desired file on your desktop or in Windows Explorer.
- Right click on the file to reveal the ‘right-click context menu’.
- Position your cursor on ‘PEM Agent’ to reveal the PEM Agent's sub-menu.
- The following encryption options are presented:
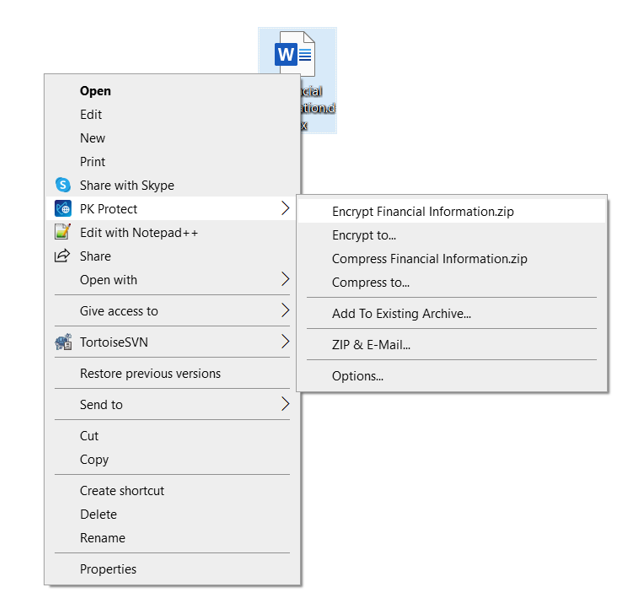
- Select the ‘Compress to’ option:
- This option will display the ‘Save Archive As’ window, for you to name the file and select the destination into which the compressed file will be placed.
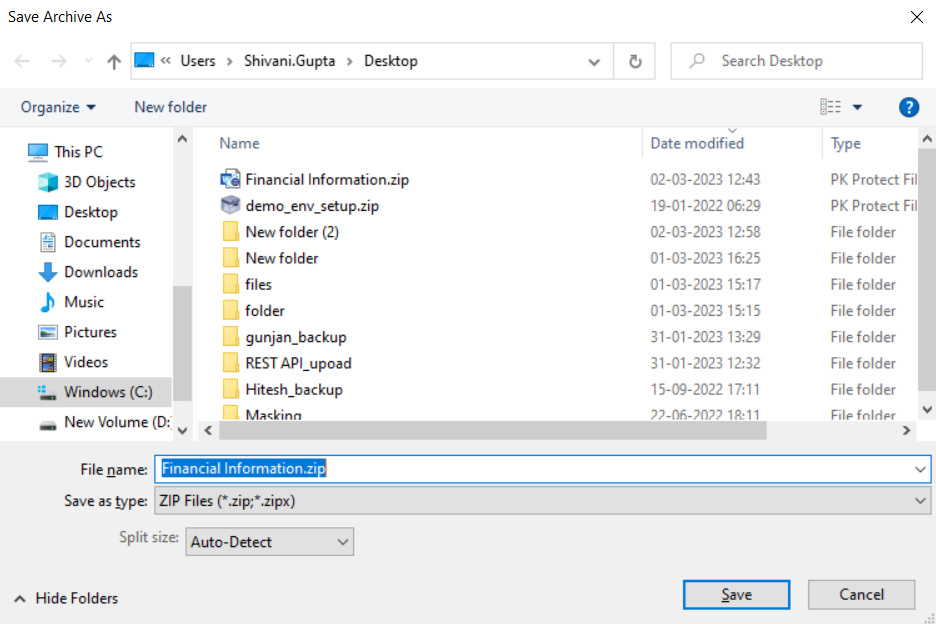
- The name of the original file will be shown in the ‘File Name’ field, do not modify this; so the compressed file will retain the name of the original.
- Select the files share or other destination into which the compressed file will be placed.
- Click Save.
- This option will display the ‘Save Archive As’ window, for you to name the file and select the destination into which the compressed file will be placed.
If the File is Still Too Large
If the default compression doesn’t reduce the size of the file below the permissible limit, you can attempt to increase the compression using the following method.
Process:
- To access the PEM Agent application’s Options menu, right-click on the PEM Agent icon running in the system tray.
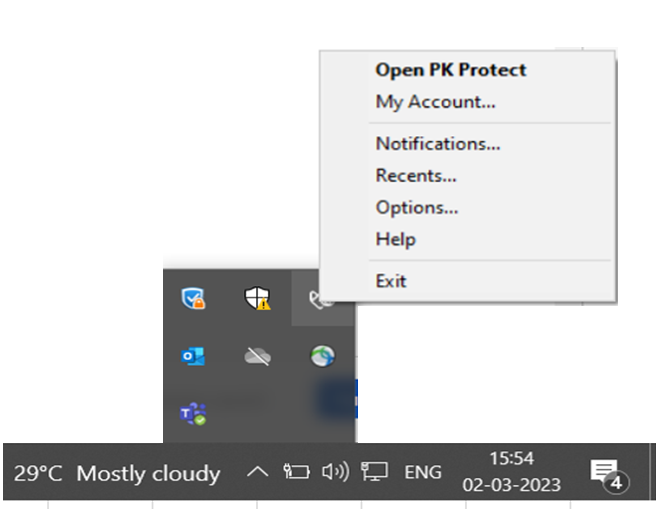
- Select “Options’

- Under ‘Compression’, navigate to the ‘Compression’ drop-down menu, and select from the following compression settings.
- Fast – Will compress the file using the method that will result in the fastest time to completion.
- Maximum – Will compress the file into the smallest possible file size. This method should only be used if all other methods don’t result in a file size that meets the size limitations, because this could take a measurable amount of time.
- Select ‘OK’ to exit the PEM Agent application options menu.
Locate the file you desire to share.\
Execute the compression using the steps outlined earlier.
After the compression has completed, attempt to attach it to your email message and send.