PK Protect has been enhanced to support an Outlook Add-In, which can be used to create security policies to protect sensitive information in email messages. The Email page under Archive allows you to configure policy workflows for email. This page also provides the facility to set some basic email configuration settings which are applicable to users or groups of users.
Email Settings
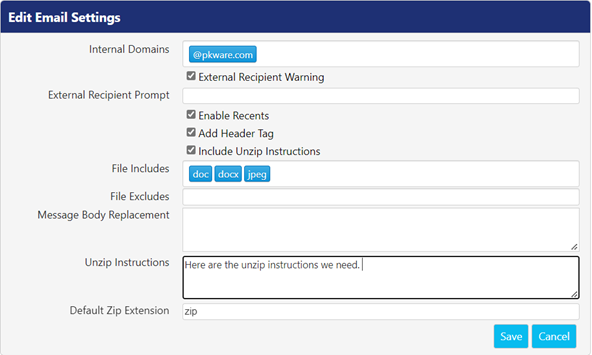
The Email Settings table is a place where you can view, set, and edit some email configurations, so that you can establish some basic rules for email usage across the board, regardless of the policy implemented.
The below table describes the email configuration settings:
Name
Description
Internal Domains
Admins can specify the domains internal to their organization
External Recipients Warning
Enabling this checkbox will warn the end user when the email is being sent outside the organization.
External Recipient Prompt
Enter the message for the prompt that you want to display to the end user when the email is being sent to external recipients.
Enable Recents
Enable this checkbox to enable Recents mode. If checked, users can select ‘Recents...’ from the PKWARE tray icon in the Windows operating system. It shows a dialog where the users can see recently sent messages.
Add Header Tag
Enabling this checkbox will add PKWARE tag to the x-header information of the email.
Include Unzip Instructions
Enabling this checkbox will allow PK Protect to include a non-encrypted document with instructions on how to decrypt the attachment.
File Includes
Specify the file extensions that will be considered by the PK Protect Add-In while performing discovery and remediation actions.
File Excludes
Specify the file extensions that will be neglected by the PK Protect Add-In while performing discovery and remediation actions.
Unzip Instructions
Text specified in this field will be provided in a text file that is sent out automatically when a user sends an encrypted attachment. This text can be plain text or HTML formatted.
Message Body Replacement
This field is the place where admin can craft customized instructions for how to access encrypted information in an email message body. This field work in combination with the Include unzip instructions. If that is selected to be Yes, then the instructions created in the ‘Message Body Replacement’ field are displayed to the recipient when they receive a message with an encrypted message body
Default Zip Name
PK Protect gives the same generic name to all ZIP file attachments that contain multiple files. In this field, specify the generic name to use. By default, the given name is ‘PK Protect Attachments’.
Default Zip Extension
This field allows you to define an alternate three-character extension for ZIP file attachments. By default, the value is set to ‘.zip’.
Save
Click the Save button to save the provided values.
Cancel
Click the Cancel buttonif you want to discard the provided values.
Email Policies
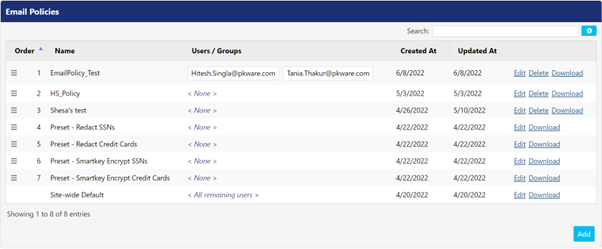
The Email Policies table displays the list of policy workflows defined specifically for email. This table is a place to view, add, edit, delete, and download policies for email.
The order of the policies in the Email page is important. The PEM Agent processes the policy list from top to bottom. Each policy has a defined scope of users that it applies to. The agent uses the first one that applies to its particular user. You can change the policy order by dragging them up and down. If no policy is defined for users, site-wide default policy is assigned to them.
Defining an Email Policy
Perform the following steps to add a new policy for email in the system:
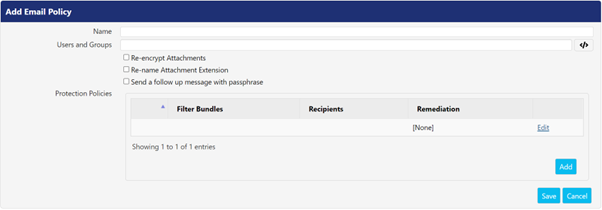
Click the Add button to view the Add Email Policy screen to define a policy. Provide values for the following fields:
Name: Enter the name of the policy in the Name.
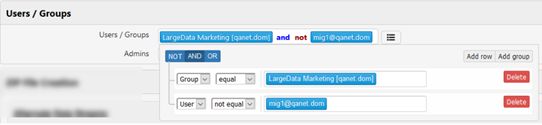
Users and Groups: List the Active Directory users and groups to whom you want to assign this policy. You can also use Boolean expressions to include or exclude multiple users and groups by using AND, OR, and NOT operators.
In the above example, the LargeData Marketing group is the Group to whom this policy applies, but the group excludes user mig1@qanet.com.
To generate this result, perform the following steps:
Click this icon in the Users and Groups field to view the options. The icon will change to .
Type the name of the group in the first row. For example, Large Data Marketing. PEM Administrator will display a list from which you can select the option.
Click Add row
In the left-most drop-down, select User.
To exclude a user, select not equal in the second drop-down.
Type the username that you want to exclude from this policy. PEM Administrator will display a list from which you can select the option.
At the top, change the Boolean operator to AND. By default, the OR operator is selected.
Click anywhere outside the dialog box to confirm the changes.
3. Re-encrypt Attachments: Check this checkbox if you want to re-encrypt the attachments to match the assigned SmartKey.
4. Re-name Attachment Extension: Check this checkbox if you want to change the extension of the attachments in outlook.
5. Send a follow up message with passphrase: Check this checkbox to enable the Recents feature. Using this feature, you can customize the message along with the password that you want to send to the user.
6. Protection Policies: Perform the following steps:
Click the Add button and provide values for the following fields:
Filter Bundles: Select the Smart Filter Bundles from the drop down that the PEM Agent will look for, in order to discover sensitive data in the outgoing email messages.
Recipients: Specify the email recipients (internal or external) to whom you want to send an email and apply this protection policy.
Remediation: Select the specific remediation from the drop down that will trigger the policy.
7. After providing values in the Protection Policies field, click Save. Otherwise, click Close.
8. Click Save to save the provided values. Otherwise, click Cancel.
Outlook Add-In Deployment
Before you can use the Outlook Add-in, the PKWARE Client Agent, the PKWARE Outlook Add-in and a TLS Certificate must be deployed and installed on the client system. The software components can be deployed in different ways depending on an organization’s policies and preferred methods for distributing software.
Distributing and installing the PKWARE Client Agent
The software components can be deployed in different ways depending on an organization’s policies and preferred methods for distributing software. As part of the installation process, a command can be used to automatically generate the TLS Certificate when the Client Agent is installed. The TLS Certificate is used to facilitate encrypted information exchange between the Client Agent and the Outlook Add-in.
Package Management Tool
If the Client Agent software is distributed to and installed on the client system using a package management tool, please follow the instructions for that particular application. If you desire to create the TLS certificate as part of the installation process, you can add a parameter (GENCERT=1) to the msi command line and PKWARE will generate the required TLS certificate as part of the installation parameters.
Using the PKWARE Deployments feature
You can distribute and install the PKWARE Client Agent software and generate the TLS Certificate by executing the following steps:
Download the ‘deployments JSON’ file from PKWARE (supplied by PKWARE support)
Modify the json to include the parameter "parameters" : "GENCERT=1", and save the file
From the Archive > Deployments page, browse to the deployments json file on your computer.
Select Save and execute the deployment.
In all cases a TLS Certificate is required. If desired, you may use your own TLS Certificate; in this case the certificate must be issued to localhost and trusted on the device. If the GENCERT=1 command is run, but finds a valid existing certificate, it will not create a new one; but instead, will allow the agent to use the existing certificate.
How to Manually add the PK Protect Outlook Add-In?
Perform the following steps:
In Outlook, click Get Add-ins from the Home tab on the ribbon. This will open the ADD-INS dialog box.
Click My add-ins on the left-hand side of the dialog box and scroll down to Custom Addins.
Select Add from URL from the + Add a custom add-in drop-down.
Click OK. The installed add-in will appear on the Outlook message screen.
Note: ThePEM Agent should be. In addition, the Agent and Outlook application should be running on the same machine for this functionality to work.
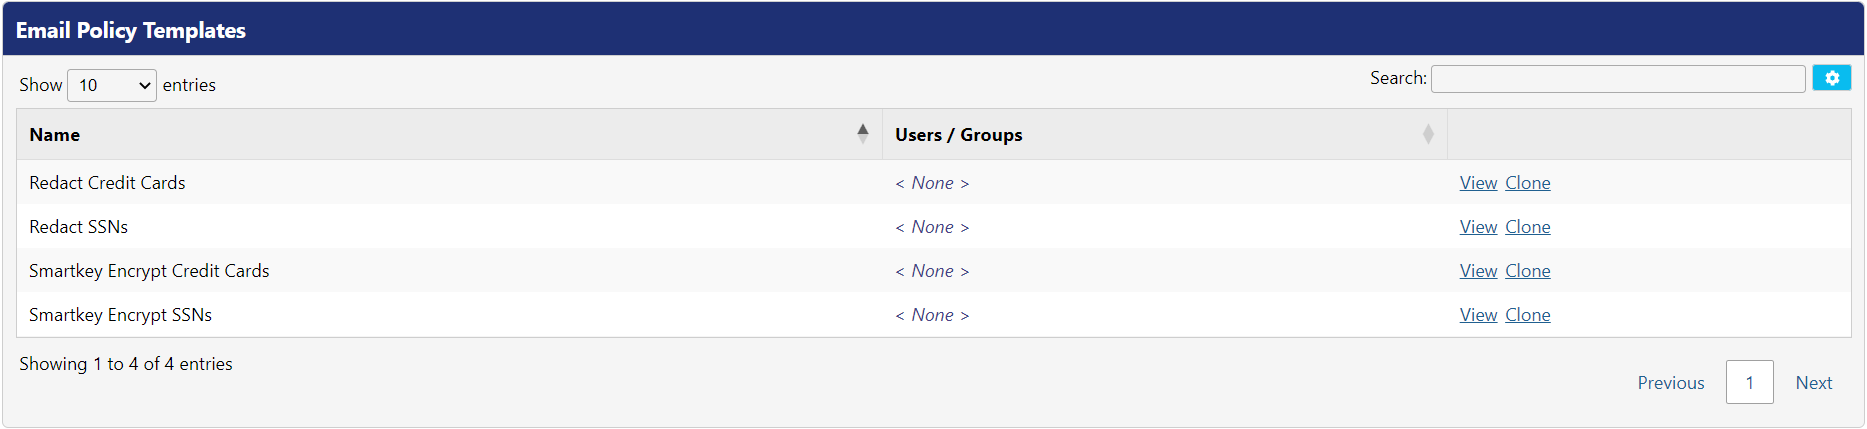
Email Policy Template
The Email Policy Template allows an administrator to create a clone of an existing email policy. It reduces the configuration time as it clones the exact information of the template.
There are four email policy templates.
Redact Credit Cards
Redact SSNs
Smartkey Encrypt Credit Cards
Smartkey Encrypt SSNs
Following actions can be performed on the policy templates:
View: This allows you to view the details of pre-defined templates.
Clone: This allows you to copy the configuration of an existing remediation action, which can be edited without impacting the original remediation action.
JavaScript errors detected
Please note, these errors can depend on your browser setup.
If this problem persists, please contact our support.
.png)