.png)
Email Remediations
The Email Remediations table displays the list of remediation actions and prompts, created specifically for email. This table is a place to view, add, edit, and delete remediation actions and prompts for email.
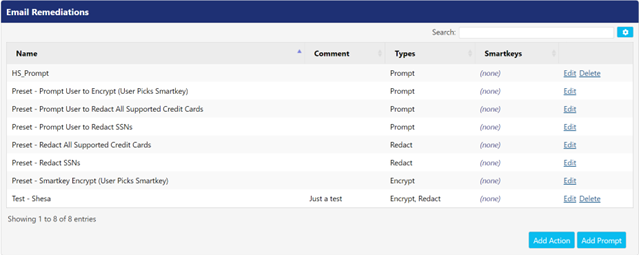
There are two types of remediations, actions and prompts.
- Actions are remediations that will take place without any end-user interaction or notice.
- Prompts will provide options for the end-user to determine the actions to be taken.
The email remediation actions and prompts defined here, can be used as remediation actions when configuring lockers and assignments.
Adding an Email Remediation Action
The Add Action button allows you to configure automated remediation actions to be executed on emails containing sensitive information.
The Add Email Remediation Action page is where you can define the specific actions to be taken as part of the remediation that are to be defined.
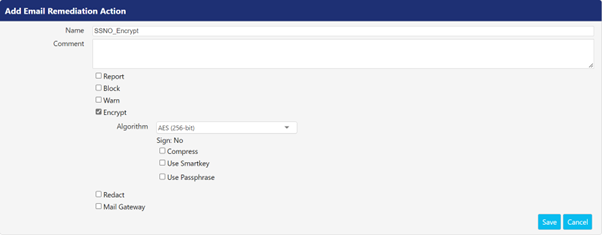
The following table describes the supported remediation types (highlighted in bold font) and the options associated to them (non-Bold), which appears when the user makes a selection:
Name | Description |
Name | A descriptive name for the remediation. |
Comment | A short description defining the purpose, scope, and intent of the remediation. |
Report | Enabling this checkbox will generate an event shown in the ‘Reports’ page when a discovery enabled remediation is executed. |
Report Discovery | If selected, any triggered discovery event will be reported to the PEM Administrator ‘Reports’ page. |
Report Success | If selected, any successfully executed discovery related action will be reported to the PEM Administrator ‘Reports’ page. |
Report Failure | If selected, any discovery related action that failed to execute will be reported to the PEM Administrator ‘Reports’ page. |
Block | This will block the email from being sent if it contains sensitive data in the Outlook messages. Enter the message in the Prompt field that you want to display to the user when Block for remediation takes place. |
Warn | This will warn the user that their message contains sensitive information, and give them the option of proceeding to send, or cancel the operation. Enter the message in the Prompt field that you want to display to the user when Warn for remediation takes place. |
Encrypt | This will cause a message containing sensitive information to be encrypted. |
Algorithm | This drop-down menu allows admins to select the algorithm to be used for an encryption activity. If this field is left blank, the default algorithm defined in Archive > Policy will be used. |
Compress | Designates that an encrypted file will also be compressed as part of the encryption operation. |
Use Smartkey | Select Smartkey(s) from the drop-down to encrypt the attachments with a specific key. The keys supported for this field are Community keys, shared Smartkeys, and private keys. If this field is left blank, it will automatically select private keys. |
Use Passphrase | Define a passphrase that will be used to encrypt sensitive data in the email. The same passphrase is required to decrypt and access the encrypted data. |
Redact | This will remove the sensitive information from the email message. |
Redaction | Select the Smart Filter Bundle from the drop down to perform redaction. |
Mail Gateway | Allows an email to be routed to a Secure Email Gateway service for delivery of the message. |
Name | The name defined here will be shown to the end user as a gateway option of where to send emails. |
Subject Prefix | Enter the text that you want to add in the beginning of email subjects. For example, if a user has a subject in their email as "ProjectXYZ" and a Subject Prefix is defined as "GATEWAY", the final string will be "GATEWAY ProjectXYZ". |
Subject Suffix | Enter the text that you want to append towards the end of email subject. For example, if a user has a subject in their email as "ProjectXYZ" and a Subject Suffix is defined as "GATEWAY", the final string will be " ProjectXYZ GATEWAY ". |
Header Tag Name | This field allows you to define a name that will be appended to the X-header information of the email message. |
Header Tag Value | This field allows you to define a value that will be appended to the X-header information of the email message. |
Decrypt Attachments | If this checkbox is checked, it will prompt the user to decrypt the attachments in the email before sending the message. |
Adding Prompt
The Add Prompt button allows you to configure a prompt that will get displayed to the users before executing certain actions.
By clicking the Add Prompt button, you can customize how the prompt will appear to the user.
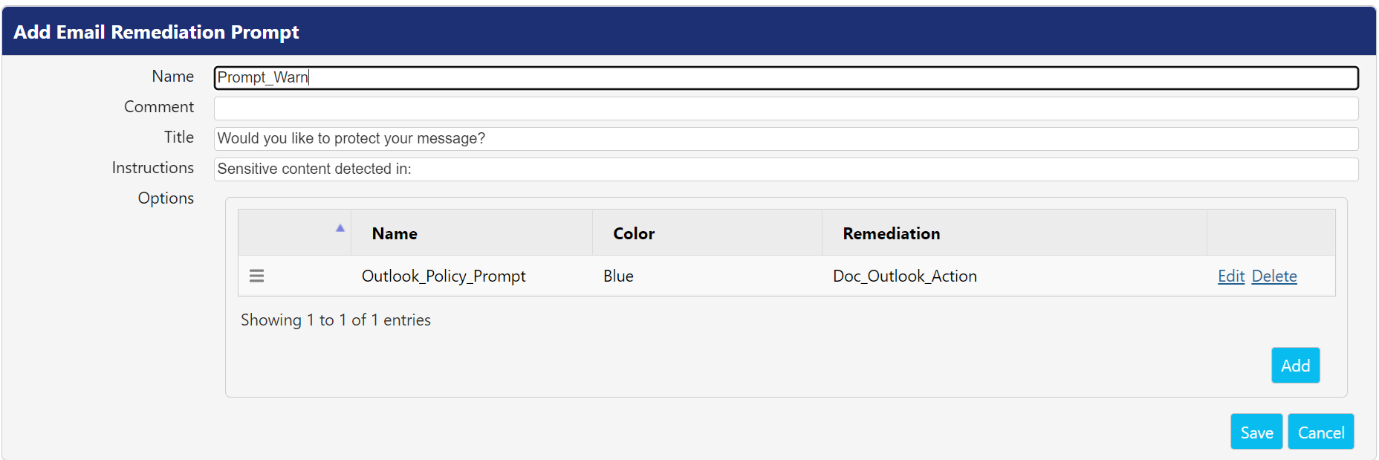
Perform the following steps to create a prompt:
- Provide a descriptive name for the prompt in the Name
- Provide a short description for the prompt in the Comments
- Enter the prompt title text that you want to display to the end user in the Title field of the prompt message.
- The text entered in the Instructions field should provide sufficient information for the end users to fully understand their task.
- In the Options field, click The Prompt Option dialog box will display on the screen with the following fields:
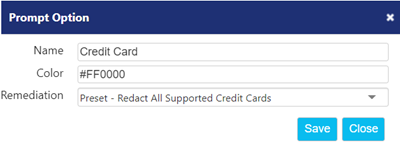
- Name: You can customize the name for the action buttons that will get displayed to the user. For example, we will define the name as: "Send from Secure Mail".
- Color: Color of the text for the action buttons. You can specify HTML color codes.
- Remediation: Select the specific remediation from the drop down that will trigger the prompt.
You can add different remediations in the Options field. To control the order of different remediation on the user prompt, drag them up or down prompt.
6. Click Save to save the provided values. Otherwise, click Close to close the dialog box.
7.Click Save to save the configured prompt. Otherwise, click Cancel.
Using the default values, the prompt shown to the end user will be shown as:
"
Would you like to protect your message?
Sensitive information detected in the following file(s):
<Examplefile.docx>
Button: Send from Secure Mail
"
Email Remediation Template
The Email Remediation Template allows an administrator to create an existing clone of a remediation action. It reduces the configuration time as it clones the exact information of the template.
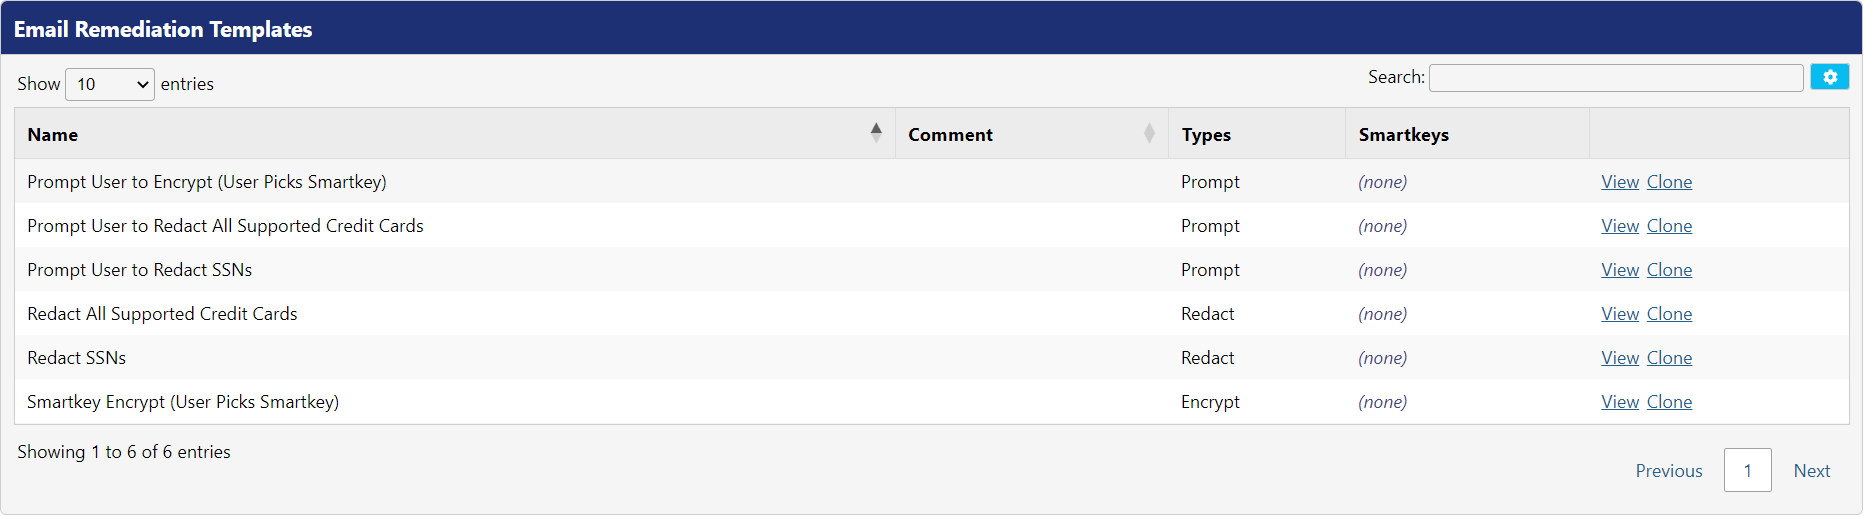
There are six email remediation action templates.
- Prompt User to Encrypt (User Picks Smartkey)
- Prompt User to Redact All Supported Credit Cards
- Prompt User to Redact SSNs
- Redact All Supported Credit Cards
- Redact SSNs
- Smartkey Encrypt (User Picks Smartkey)
Following actions can be performed on the templates:
- View: This allows you to view the details of pre-defined templates.
- Clone: This allows you to copy the configuration of an existing remediation action, which can be edited without impacting the original remediation action.